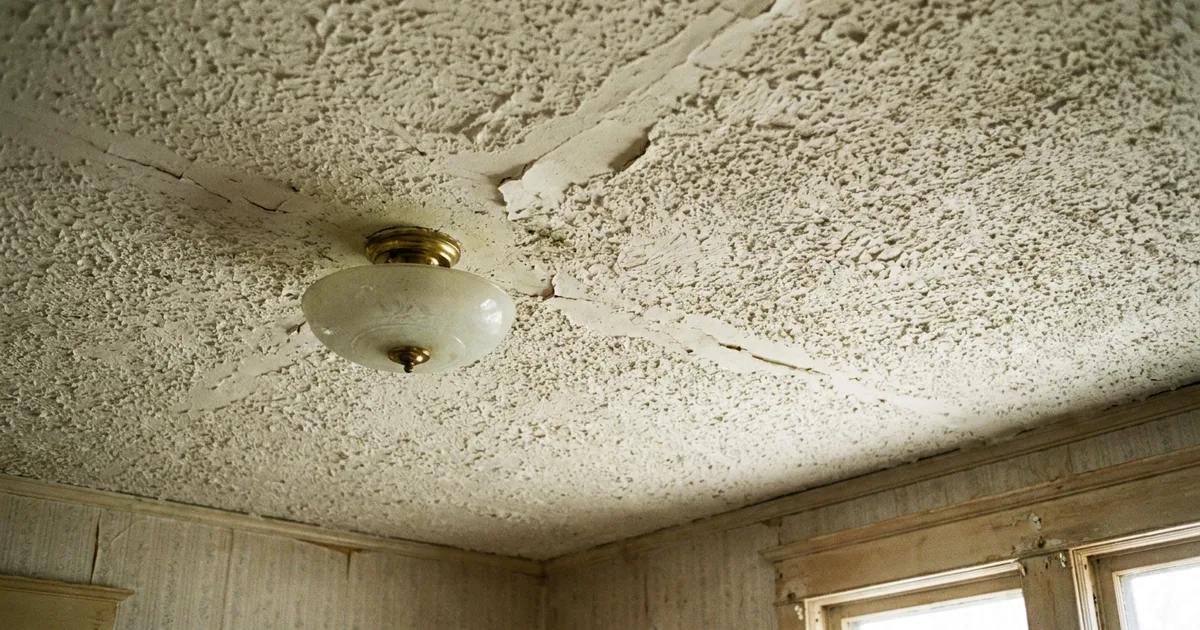
You can’t tell if a popcorn ceiling has asbestos by looking at it. Not by the texture, not by the color, not by how old it looks. Asbestos-containing and asbestos-free spray texture are visually identical, which is exactly why so many homeowners either panic and pay $750 for a professional visit or ignore it and hope for the best. Neither is necessary.
Two things actually matter. The first is your home’s build year, which narrows the odds before you spend a cent. The second is a lab test, which settles the question for $30 to $80 rather than hundreds of dollars. If it comes back positive, you have more options than the one most contractors will quote you.
This guide walks through what your ceiling’s age tells you, how to collect a sample safely yourself, what testing and removal actually cost, and why sealing an intact ceiling can cost a fraction of tearing it out, which is the option almost no contractor puts in front of you.
Short answer: A popcorn ceiling installed before 1980 has a 60% to 80% chance of containing asbestos. You can’t confirm it by sight, but a $30 to $80 lab test will settle it either way. Do not pay for a $750 professional callout until you know whether you even need one.
Does Your Popcorn Ceiling Have Asbestos? What Your Home’s Age Actually Tells You
The single most useful signal for whether you have an asbestos popcorn ceiling is the one you already know: when it was sprayed. Popcorn and acoustic textures went onto US homes from the mid-1940s through the early 1990s, peaking from the 1950s through the 1980s. Asbestos fiber was mixed in because it was cheap, added fire resistance and sound dampening, and helped the texture hide drywall seams.
Your build or last-renovation year puts you in one of three risk bands:
- Pre-1980: a 60% to 80% chance the texture contains asbestos. This is the high-risk group, and it covers a huge share of the older housing stock in states like California.
- 1980 to 1989: a 20% to 40% chance. The risk drops but never hits zero, because manufacturers were allowed to sell through existing stock and contractors kept using older bags of material.
- Post-1990: unlikely, but documented in some early-90s leftover-stock installs. Do not treat 1990 as a guaranteed safe cutoff.
Here is the misconception worth clearing up: there was no single ban year. People search for “what year did popcorn ceilings stop having asbestos” expecting a clean cutoff, and there isn’t one.
The EPA’s Asbestos NESHAP rule banned spray-applied surfacing material over 1% asbestos back in 1973, and a broader manufacturing ban followed in 1989. But a 1991 federal court ruling, Corrosion Proof Fittings v. EPA, vacated much of the 1989 ban, and asbestos was never fully outlawed in the US the way it was in the UK. That legal messiness is exactly why installs kept happening long after the dates most homeowners assume were safe.
Why You Can’t Tell Just by Looking
When people ask how to tell if a popcorn ceiling has asbestos, home-improvement forums are full of answers claiming you can spot it by the sharpness of the texture, the shade of the yellowing, or how old the ceiling looks. That advice is wrong, and it is actively harmful because it gives false confidence in both directions.
Asbestos-containing and non-asbestos spray texture can both be lumpy, rough, or stalactite-shaped. They can both yellow with age and both crack over time. Appearance and color are simply not diagnostic. A ceiling that looks pristine can be loaded with asbestos, and a crumbling one can be perfectly clean.
There is one visual cue with any value, and it has nothing to do with asbestos content. If you see paint applied directly over friable, cracking texture, the material has already been disturbed. That raises the urgency for testing regardless of what the lab eventually finds, because any damaged material sheds particulate into the air you breathe. Eyeballing tells you nothing about asbestos, but it can tell you the material is deteriorating, which is a reason to test sooner rather than later.
How to Safely Test a Popcorn Ceiling for Asbestos Yourself
In most states, homeowners are legally allowed to collect their own sample for lab testing. This is a different legal category from removal, which is regulated far more tightly. Sampling a small, intact patch yourself is usually permitted, and it is how you avoid a $250-plus professional callout just to get a chip of material into a lab.
Here is the safe method, in order:
- Turn off your HVAC. Running air handling circulates any fibers you release, so shut it down before you touch the ceiling.
- Mist the target area with water. A light spray binds dust and cuts the amount of airborne fiber released when you cut. Do not soak it, just dampen the surface.
- Wear an N95 or P100 respirator and disposable gloves. A paper dust mask does not count. Fibers pass straight through it.
- Cut a quarter-sized section with a utility knife, going down to the drywall so you capture the full thickness of the texture.
- Bag it immediately in a sealable specimen bag, or double-bag it in two zip-lock bags, and label it.
- Wet-wipe the area and your tools afterward. Never vacuum. A standard household vacuum aerosolizes fibers and spreads them instead of containing them.
Do not sample yourself. Call a licensed professional instead, if any of these apply:
- The material is already crumbling or highly friable to the touch.
- The area you would disturb is larger than roughly 3 square feet or 3 linear feet. That is the EPA AHERA “small-scale, short-duration” threshold that many state rules key off.
- The room is occupied by children, elderly residents, or anyone with a respiratory condition.
- You are unsure of your state’s specific rules. Some states require licensed sampling regardless of the area size.
When in doubt on that last point, treat it as a stop sign. The cost of a professional sample is trivial next to the cost of contaminating a room you then have to remediate.
DIY Test Kit vs Professional Sampling: Cost and Turnaround
Once you have decided whether you are sampling yourself or calling someone in, the question is which lab path to use. There are three, and they vary a lot on price.
| Path | Cost | Turnaround |
|---|---|---|
| DIY test kit (single sample) | $30 to $50 | 24 to 72 hours after the lab receives it |
| DIY multi-sample kit | $80 to $150 | 24 to 72 hours (rush fee $25 to $75) |
| Direct-to-lab (self-collected, no retail kit) | $22 to $80 per sample | Varies by lab and rush option |
| Professional collection and submission | $250 to $750 per visit | Lab time plus a scheduled site visit |
A DIY kit includes sampling instructions and prepaid mail-in submission, which is the simplest route for most people. The direct-to-lab option is the one homeowners miss: if you are comfortable collecting the sample using the method above, you can mail it straight to a lab without paying for the full retail kit, which is often the cheapest path of all.
Professional collection is the right call, and sometimes the legally required one, the moment any of the stop-triggers from the last section apply. Every path uses the same analysis, polarized light microscopy (PLM), which is the industry standard for solid building materials.
The result confirms both whether asbestos is present and roughly what percentage. Anything over 1% is regulated as asbestos-containing material, or ACM, under EPA and most state rules, and that 1% line is what decides whether you are looking at a cosmetic job or a regulated one.
If It Comes Back Positive: Removal vs Encapsulation Costs
This is where most cost guides stop being useful. They quote a removal number and leave it there. The full picture has two paths, and the cheaper one rarely gets a mention.
Start with the baseline. Removing a standard, non-asbestos popcorn ceiling runs $932 to $3,080, with a typical project around $2,004. Once asbestos is confirmed, remediation costs stack on top of that. Expect $5 to $20 per square foot for the abatement work itself, plus $75 to $200 per hour in labor, plus $150 to $400 in hazardous-waste disposal fees. Asbestos debris cannot go in regular trash. It has to be taken to a licensed disposal facility, and that fee is not optional.
Now the part competitors skip. You have two genuine remediation options, not one:
- Full removal is the most thorough and the most expensive. It is the right choice, and often the required one, if the ceiling will be renovated or disturbed again in the foreseeable future.
- Encapsulation seals the existing texture under a specialized coating so the fibers can never become airborne. It is viable whenever the material is otherwise undamaged and will be left alone.
Most competitor articles do not mention encapsulation at all, which quietly steers homeowners toward the pricier job. On an intact ceiling it can cost a fraction of full removal for the same practical result: no airborne fibers. Ask any contractor to quote both options before you commit to tearing the ceiling out. If they only quote removal, that tells you something about how they bill, not about what your ceiling needs.
Why Testing and Removal Rules Differ by State (and How to Find Someone Licensed)
There is no national asbestos register in the US. Abatement licensing is run state by state, and each state sets its own rules on who can legally test, sample, and remove ACM, and what area-size thresholds trigger mandatory professional involvement.
That has a direct consequence for everything above. The DIY-versus-professional line drawn earlier, the 3 square foot AHERA threshold and the occupied-space rule, can be stricter where you live. A few states require licensed sampling from the very first chip. So confirm your specific state’s rule before you assume self-sampling is allowed. In New York, for example, you would check the state’s own program rather than rely on a national rule of thumb.
This is also where the aggregators fail you. Yelp, Angi, and BBB list contractors without ever checking whether their asbestos license is current, or whether they hold one at all. A five-star rating is not a license. The whole point of a state licensing register is that it is government-verified, and that is the gap The Asbestos Register exists to close. Every firm listed is checked against its issuing state’s official register, with the license number and agency shown alongside it, so you are not gambling on an unverified listing when the stakes are airborne asbestos.
So the sequence is short: your ceiling’s age sets the odds, a lab test settles them for less than a nice dinner out, and a positive result gives you two paths, not the single expensive one most quotes assume. The only part you can’t afford to guess on is who you let touch the material, and that comes down to whether they hold a current state license, not how many stars they have online.