You’re standing in your basement looking at a chalky white wrap around a pipe, or you’ve just pulled up the corner of a 9-inch floor tile, and you want one thing: to know if this is asbestos. So you search what does asbestos look like, hoping a photo will settle it. Here is the uncomfortable answer first. No material has a distinct “asbestos look.” The fibers are microscopic. Nothing you see with your eyes confirms or rules it out.
So this guide does the next best thing. When you ask what does asbestos look like in a house, the useful question underneath is really this: is the thing in front of me worth testing? That comes down to two filters that actually work, where you are standing and how old your house is. Everything below narrows the list by those two, so you can decide whether to leave it alone or pay to know for sure.
Every top result organizes this by material type, which forces you to scan a whole page to find the one paragraph about pipe wrap. This one is organized by room. Jump to the section that matches where you are, cross-reference it against your build year, and end with a real next step instead of a lawsuit funnel or a single contractor’s phone number.
The one thing to hold onto: visual identification is triage, not diagnosis. Your eyes narrow the list of materials worth testing. Only an accredited lab confirms asbestos. And whatever you are checking, do not sand, drill, or scrape it, because disturbance is what releases fibers.
What Does Asbestos Look Like? Why You Can’t Tell by Sight Alone
Here is the truth about how to identify asbestos: there is no color, pattern, or texture that confirms it on its own. The fibers that make it dangerous are microscopic, and the only reliable confirmation is polarized light microscopy on a physical sample in an accredited lab. Government asbestos authorities, contractors, and even the legal-marketing sites all say the same thing. So a guide to what asbestos looks like can only do one honest job. It helps you spot which materials are worth the cost of finding out for certain.
So reframe what you are doing here. You are not trying to reach a verdict by staring at a ceiling. You are deciding whether a material is worth the cost of a test. A professional inspection with a few lab samples typically runs $300 to $700, and that is an industry estimate rather than a government figure. Visual identification’s real job is to tell you whether spending that money makes sense.
Why is the bar for exposure so low? The OSHA permissible exposure limit for airborne asbestos is 0.1 fibers per cubic centimeter of air, averaged over an 8-hour shift. Fibers that small are the entire problem, which is exactly why you cannot see them and why intact material left alone is far safer than the same material once you have taken a sander to it.
That gives you the one rule that applies to every section below. When you check a material against this guide, do not disturb it. No sanding, drilling, scraping, or forceful cleaning. Look, note the build year, and decide whether to test.
The one thing that narrows the odds fast, before you even look closely at the material, is knowing when your house was built.
The Fastest Filter: What Year Was Your Home Built?
Home age is the single most useful signal you have, and it is the one competitors keep repeating without ever tying it to the material in front of you. “Before 1980” floats around every article as a date with no context. Here is the context. Think of your home in three tiers.
- Pre-1980: meaningfully higher risk across nearly every category in this guide. If your house predates 1980, treat every material below as a genuine candidate until a test says otherwise. This is the tier where the signs of asbestos in old homes actually cluster.
- 1980s: a transition zone. Restrictions on specific product categories were phasing in but were not complete, and contractors kept using older stock. Lower odds than pre-1980, but not clear.
- Post-1990: materially lower risk, especially for floor tile and cement products. Not zero, though, because a full federal ban was never enacted and many product categories stayed legal with fiber-content limits.
This matters because roughly half of US homes were built before 1980, per the 2019 American Community Survey from the U.S. Census Bureau. That is not a niche statistic. It means this guide is directly relevant to about half the people reading it. It is also widely reported that more than 30 million tons of asbestos went into US construction between 1900 and 1980, which is the scale that explains why the material is still sitting in so many houses.
Before you read another section, find your build year. A property listing, your county assessor’s site, or the original building permit will all show it. Assessor records are public in most of the country, so if you own a home in a large state like California, the year is a quick lookup away. Knowing it will save you from testing things that were installed a decade after the risk window closed.
With your home’s age in mind, start at the top of the house. The attic is one of the highest-priority checks on this list.
Attic: What Does Asbestos Insulation Look Like in Vermiculite?
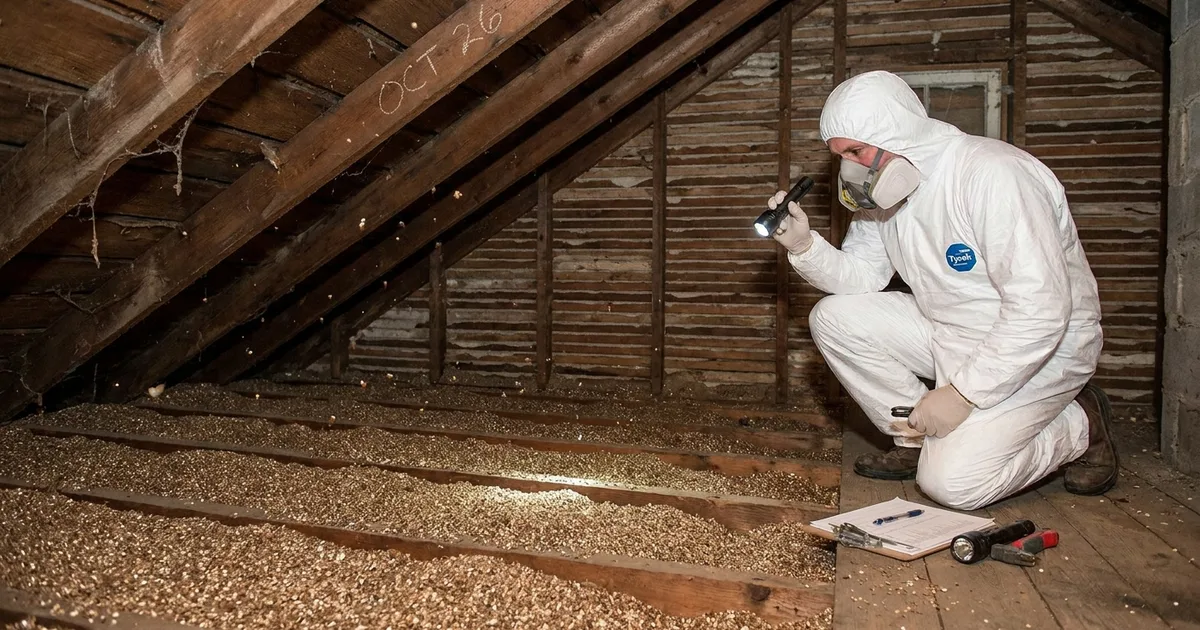
Vermiculite insulation is the material to take most seriously in an attic. It shows up as loose, lightweight, pebble-like granules, poured or blown across the attic floor and into wall cavities. The color runs from gold-brown to silver-grey, and it often carries a faint metallic or mica sheen that catches the light. That shimmer in the granules is what vermiculite insulation looks like, and it is the giveaway.
The brand name to search for is Zonolite. It was sold for decades, and vermiculite was used from the 1920s through the 1990s, a wider window than almost anything else on this list. That long span is one reason it ranks so high on the priority order.
Not all vermiculite contains asbestos. But a large share of what was sold in the US traces back to a single mine in Libby, Montana that was contaminated with asbestos and shipped nationwide. That is why “it looks like vermiculite” should stop a DIY attic cleanout rather than merely spark curiosity. Do not rake it, bag it, or wade through it to run cable. Leave it, note the sheen and the granule shape, and put it on the test list.
Ceilings: What Does a Popcorn Ceiling With Asbestos Look Like?
A popcorn or textured ceiling has a bumpy, cottage-cheese-like sprayed surface. It was standard in US homes from roughly the 1950s through 1980, then phased out as asbestos content in the underlying compound was restricted. The honest answer to what does a popcorn ceiling with asbestos look like is that it looks exactly like a popcorn ceiling without asbestos. The texture tells you nothing. The build year tells you almost everything.
What matters far more than the appearance is what you plan to do to it. Scraping, sanding, or “popcorn removal” on a pre-1980 ceiling is the highest-risk DIY renovation scenario in this whole guide, because a dry scrape sends the fibers straight into the air of the room you are standing in.
So the instruction is blunt. If you are planning to remove a popcorn ceiling and the home predates 1980, test before you touch it, not after. A positive result changes who is allowed to do the work and how it has to be contained. Finding out mid-scrape is the worst possible time.
Head down to the basement or utility room next, where the material is easy to miss because it does not look like insulation at all. It looks like old plaster wrapped around a pipe.
Basement & Utility Room: Pipe, Boiler, and Duct Insulation
This is the material homeowners walk past for years without recognizing. Asbestos was used heavily to lag hot-water and steam pipes, boilers, and furnace ducts through the mid-20th century. It appears as a chalky, plaster-like white wrap or coating, and at the joints and elbows you will often see a corrugated cardboard or canvas-like fabric casing over the pipe. It reads as old plumbing, not as a hazard.
Pay closest attention to those joints and elbows. That is where the wrap is thinnest, where it was most handled during past repairs, and therefore where it is most likely to be cracked and already shedding fibers. A run of intact pipe insulation is one thing. A crumbling elbow with the casing flaking off is the spot that moves this from “test it” to “keep people out of the room.”
If you are about to do any furnace, boiler, or pipe work in a pre-1980 basement, this is the section to reread before you start. The wrap sheds most when a wrench or a shoulder knocks against a fitting, which is exactly what happens during the job you were about to do.
Flooring is where this guide gets genuinely specific, because unlike insulation or ceiling texture, there is an exact measurement that narrows the odds.
Flooring: Vinyl Floor Tile and Sheet Vinyl
Here is the most concrete cue in the whole guide. A 9-inch-by-9-inch vinyl floor tile is the single strongest visual and size indicator of pre-1980, often asbestos-containing, flooring you will find anywhere in a house. You do not need an expert eye. You need a tape measure. If the tile measures 9 by 9, treat it as a candidate.
The reason the measurement works is that the industry shift to 12-inch-by-12-inch tiles roughly tracked the move to non-asbestos formulations. That said, do not over-read it. A 12 by 12 tile is not automatically safe. It improves the odds but does not settle the question. Measure, note the size, and let it inform whether you test, rather than treating 12 by 12 as a green light.
Color is the trap to avoid. Mottled or speckled coloring is typical of older tile, but plenty of asbestos-free tile is mottled too, and plenty of asbestos tile is a plain solid shade. Do not lean on the pattern. Lean on the measurement.
There is one risk you cannot see at all. Under sheet vinyl flooring, the backing and the adhesive layer are common asbestos-containing components, and they stay invisible until the flooring is lifted. This is the kind of thing you would never think to check, which is exactly why it belongs on the list. If you are pulling up old sheet vinyl in a pre-1980 home, the layer glued to the subfloor matters as much as the surface you have been walking on.
Exterior: What Does Asbestos Siding Look Like?
Asbestos-cement siding and shingles are a mid-century product, roughly 1920s through 1980s, and they have a distinctive look once you know what to check. The panels are flat, grey, rigid, and cement-hard. The two cues that separate them from other siding are a wavy patterning along the bottom edge of each course and an embossed wood-grain texture pressed into the face. That combination of a rigid cement feel with a faux wood-grain surface and a wavy lower edge is the profile to look for.
There is an important lookalike, and this is where build year earns its keep. Modern fiber-cement siding, the HardiePlank-style products, can look strikingly similar at a glance. It is flat, grey, and can carry its own wood-grain embossing. But it postdates the asbestos formulations entirely. Appearance alone will not separate the two, so the tiebreaker is the age of the installation, not how the board looks in your hand.
Garage & Shed: Corrugated Cement Sheeting
Corrugated asbestos-cement sheeting is the same material family as the exterior siding above, shaped into wavy, ridged panels for roofs and walls on outbuildings. On a garage, shed, or workshop of the same 1920s-to-1980s era, those grey corrugated sheets are a candidate material, full stop.
The reason this one gets missed is simple. Homeowners audit the house carefully and then treat the garage as an afterthought, even though it was often built from the same product line at the same time. If your home falls in the risk window, walk the outbuildings too. The corrugated roof over the car deserves the same look you gave the attic.
If you have matched a material to any of the sections above, the next move matters more than the identification itself.
You Found a Match: What to Do Next
You have a candidate, not a confirmation. Hold that distinction, because the right actions follow from it.
First, leave it exactly as it is. You have read why in every section above, so treat this as the reminder that it matters most right now: no sanding, drilling, scraping, or forceful cleaning while you sort out the next step. A candidate you have not touched is not an emergency.
Second, do not treat a consumer test kit as your finish line. The only way to get a real answer is accredited lab testing of a physical sample, and getting the sample safely is itself a job with rules. This is why professional asbestos testing exists as a distinct service from removal. Budget the $300 to $700 range noted earlier for an inspection with a few lab samples, so the cost is not a surprise when you make the call.
Third, understand the regulatory split, because it explains why there is no single national phone number to call. Federal renovation and demolition rules under the EPA’s NESHAP standards technically do not apply to a homeowner renovating their own home. But state and local rules often do, and asbestos licensing itself is run state by state with no national register. That is precisely why “who do I actually call” has a different answer in every state.
Which is the gap this directory closes. Rather than a legal contact form or one contractor’s number, you can find a state-verified inspector near you, checked against the official licensing register for your state. If the test comes back positive and you need abatement next, the same directory covers asbestos removal firms verified the same way. In a large market like New York, that means reaching a firm whose license you can actually confirm, instead of gambling on a five-star rating that says nothing about whether they are licensed at all.
So you leave with three things clear. Visual identification is triage, not diagnosis. Your home’s build year is the fastest filter you have. And the next step is a licensed, state-verified inspector, not a guess, not a DIY kit, and not a lawsuit. You started standing in front of a suspicious material with no plan. You end with a specific one.